Last Updated on April 29, 2021 by James
Usage of hammers is nothing new. Since ages, hammers have served as one of the most essential tools. With advancing times and modern tech, it just took the shape of nail guns. Broadly, nail guns are of two types; finish nailer and a brad nailer.
Brad nailer is basically a smaller and narrower nail gun as compared to a standard nailer. This hand-held tool has a smaller head and is used by carpenters and woodworkers to attach small moldings or for attaching lightweight trim to a woodworking project. They are very short in length, ranging from 5/8-inch up to 1-1/2 inches. Typically, these brad nailers use 18-gauge wire, therefore they are perfect to do smaller holes or on smaller wood projects that need limited hole visibility.
As brad nailers are smaller tools, and work for only delicate nailing projects, therefore they are the most preferable tool for many DIY-ers and small carpenters. These brad nails do not have the strength to hold large finish nails, therefore these are not intended for attaching heavy pieces of trim.
Brad Nailer Styles
Brad nailer are of two types: pneumatic and electrical or cordless. Electric Brad Nailers are more expensive and heavier in weight than the pneumatic ones. Let’s understand them in detail:
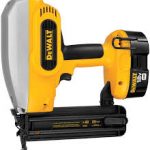
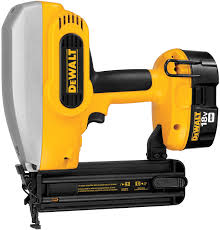
Electrical Brad Nailer
A cordless brad nailer is extremely quick and easy to use and works best for basic projects. It is powered by a rechargeable battery and a compressed air canister, which means there is no need to set up and operate an air-compressor. However, if the battery falls flat, the work comes to halt.
Pneumatic Brad Nailers
On the other hand, a pneumatic brad nailer requires an air compressor in order to work; there is no hassle of charging the battery. It keeps on working as long as you have air pressure.
Mostly people prefer pneumatic brad nailers, but with time people have started shifting to these cordless brad nailers, because of the convenience and ease of its work. Which one works best for you, totally depends upon your personal preference and the kind of features you require.
Step-by-Step Guide of Using a Brad Nailer
This is a relatively simple tool to operate, and doesn’t require any rocket science. So, if you are not a professional handyman, hers’s a step-by-step guide that will help you to operate a brad nailer like a pro:
#Step 1 – Purchase The Perfect Hose Adaptor:
When using a pneumatic brad nailer, buy a correct hose adaptor and make sure that your nailer is firmly attached to the portable air compressor. Other things that need to be bought are pneumatic tool oil and Teflon tape. Teflon tape basically secures a tight connection between the brad nailer and the hose.
#Step 2 – Cover The Connector With Teflon Tape
Now this is an important step. Carefully, wrap the suitable fitting on the hose adaptor with the help of Teflon tape. It is further recommended to use the adjustable wrench to tighten the connection and avoid any air flow.
#Step 3 – Lubrication of the Device
Any device, in order to work effectively, needs regular oiling. So make sure you lubricate the adaptor by using pneumatic tool oil. Don’t go overboard, a few drops are more than sufficient. After oiling, make sure to clean the device and any excess oil on it, with a rough cloth.
#Step 4 – Loading the Device
Make sure to load the tool with the right nails, in accordance with the model of your device. Fill it with sufficient quantities, to complete the project-at- hand.
#Step 5 – Attaching Device to the Air Compressor
Before applying the air compressor to the system, make sure that it is adequately pressurized. Once it is prepared, attach one end of the hose to the air compressor and the other end to the brad nailer. Make sure that the ends are tightly connected. In case you feel the connections losing, make use of the adjustable wrench to tightly secure them in place.
Make sure to control the air hose pressure via the regulator button. And once, the work is done release all the air from the compressor, to avoid build-up of moisture inside.
#Step 6 – Checking the Device Timely
Testing the device before making any actual attempt, eliminates the chances of any mis-happenings. So, to check whether the device is functioning properly or not, try using it on an unwanted piece of wood. Hold the handle in the right position. Do it with precision and make sure nothing disrupts the process. The tip of the tool should rest on the top of the wood at a roughly 90-degree. Just pull the trigger and allow the nail to sink inside. If brad nailer works perfectly in the testing phase, then start with the main project.
While blasting the nails inside, a lot of pneumatic force is produced. So make sure you handle and manage the tool carefully.
Conclusion
Just like any other tool, make sure that you take adequate care before operating this one. If you are using a brad nailer especially for the first time, make sure that you are thorough with the manufacturer’s instructions and any safety guidelines, if given. Equip yourself with a pair of safety goggles, thick gloves, and a hearing protector. https://outline.com/WpP8Wv