Last Updated on April 29, 2021 by James
“The right tool for the right job” stands successively true with brad nailers. There is no denying the fact that to produce great work you need right and proper tools. When it comes to carpentry or fixing small things, there is nothing better than a light duty brad nailer.
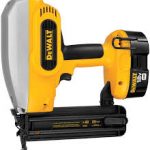
A brad nailer is basically a tool that helps to secure things with 18-gauge nails that are between 5/8” to 2” in length. With a thinner gauge and smaller heads, this handheld power device is a smaller version of the finish nailer. So, as far as size is concerned you can easily differentiate between the two. Capable enough to attach only lightweight trims, they give you a well disguised hole and eliminates the need to use any fillers.
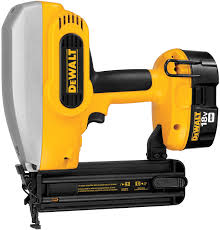
These nailers are normally used for precision jobs, smaller wood projects or for upholstery. There are mainly two types of brad nailers available in the market. One is pneumatic brad nailer and the other one is electric brad nailers. Pneumatic nail guns will require the use of a powerful air compressor while the cordless brad nailers use flammable gas and are powered by a rechargeable battery.
Before we discuss any further, let’s have a look at some of the main features of brad nailers:
Features of Nailers
Picking the right kind of nails seem simpler, but believe us, it isn’t. Varied factors need to be considered before purchasing the right nails to accomplish the project. So, lets get thorough with the basics of nailers that will facilitate your decision for the better. Take a look:
1. Nose Design – It is also the tip of the nailer. Now, this is important as it hampers the precision. Narrow tip allows you to sink a nail/brad into a particular spot, allowing you more precision.
2. Tool-free jam or nail release – Buying a brad nailer with a tool-free jam or nail clearing mechanism is utmost important to remove the to jammed nail. These days this mechanism is equipped in the lever of the device. This feature is very important as it allows for a hassle free functioning.
3. Depth Adjustment – As the name says, it is adjusting the nailer as per the thickness of the material or size of the nails. Close to the tip, there’s a dial that has to be turned clockwise or anti-clockwise, to adjust the depth.
4. Anti-dry fire – Another useful feature that prevents the empty nailer from catching fire. When a nailer fires without any nail in the magazine, it is dry fire. This might impact a force that can cause damage or dent the device. To prevent this, anti-dry fire mechanism stops you from firing the nailer in case their are no nails in the magazine.
5. Exhaust air control – Always opt for a brad nailer with the air exhaust at the rear of the nailer. This feature basically works for pneumatic brad nailers as they are the once that compress air from the compressor. Once the job of air is done, it can easily escape via the exhaust, making way for you to fire another nail.
6. Nailing Modes Control – This feature is only available in premium nailers. These modes lets you modify how you want to nail. Contact nailing and the sequential nailing mode are two common nailing modes. The contact nailing mode boosts productivity while the sequential firing mode ensures safety as it doesn’t let you to fire another nail in case nose remains compressed. So make sure to buy a convenient brad nailer that allows you to switch between the two firing modes without any tools.
7. Ergonomics – Prefer rubberised handles or wraps surrounding it, as it gives a better grip and prevents slipping due to sweat.
To know more about how to use a brand nailer click here
Loading Brad Nails into Nail Gun
More or less, almost all the nail guns have a similar nail-loading mechanism. Some brad nailers load brads from the side while others load from the top. However, it is imperative to load the brad nailer appropriately with adequate number of the brads and close the magazine correctly. Take a look at some of the points that are common while loading all kinds of nailers:
1. Read the instructions – In short, prepare well before you start. Make sure that you read all the warning labels that come across with the nail gun thoroughly. Follow those instructions and go step-by-step as explained there to properly load the nail gun.
2. Airholes – To avoid any leakage of air, make sure to tighten the airholes. Here, you can make use of the Teflon tape. Now, if you’re using the pneumatic one, then connect your nailer to the air supply. Once your nail gun is connected to the air supplied by your compressor, you can go ahead with loading the tool. Now, there’s always a risk of accidental discharge, so make sure that the trigger is not activated and you keep the tool slight away from you while loading.
3. Brad Magazine – It is very important to make sure that the device magazine is empty of nails. Via depressing the cartage, you can open the brad magazine. Now, go ahead and angle the nails here, as per the instructions.
4. Loading – Nails should be pointed out towards the front of the gun, and the head of the brad should fit correctly and comfortably. Eventually, put the strip of the nails at the bottom of the magazine. Load as many brads that fits well in the magazine, but make sure not to overload it.
5. Pusher – Lastly, slide the pusher in the magazine to close it until it clicks in place. Once done, you’re ready to go. Automatically, pusher will keep on loading nails into the mechanism to help you accomplish your task.
Conclusion
Purchasing a high-quality brad nailer is completely worth the investment. Adding a few drops of tool oil regularly is important to facilitate smooth functioning of the device. Any kind of tool should be used while wearing proper safety gear, same goes for his one, too. Also, make sure to disconnect the air hose after use and buy a safety box/case to prevent the nail gun from any accidental damages.