Last Updated on July 24, 2021 by James
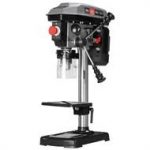
A drill press machine is a fixed drilling machine that can be mounted or bolted to a stand, floor or workbench. With their immensely powerful motor reducing the effort needed for the various drilling purposes, drill presses bring in flexibility and utility to the workman’s kit.
A drill press is a versatile tool for many tasks, primarily boring holes in wood and metal. Some drill presses are also equipped with drill bit changers allowing the use of different sized drill bits from 1/64 inch through 3/8 inch diameter.
The most important features to consider when purchasing a drill press are the size in inches (diameter) of the work table and drill press spindle travel distance in inches; always get one that will accommodate your projects. The drill press should be rated at no less than 3500 rpm (rotations per minute). And, it should have an adjustable table height between approximately 6 – 9 inches above the supporting base. An optional feature is an LED light to illuminate your drilling area.
Setup
Before installing drill chuck, first sight down drill axis to ensure drill press spindle and drill chuck are aligned. Adjust drill press table height to accommodate your project.
1. Locate a drill bit that is slightly larger than the hole you want to drill to allow for ease of drilling without excessive force or over-drilling. For example, if you need a 1/2 inch hole, select an 11/64 in the drill bit. Place this drill bit in the drill chuck on the end where there’s only one slit; this is called the Drill Chuck Keyless (Screw) Chuck. Drive it until snug using a rubber mallet and adjust as necessary so it remains firmly set in place when turned clockwise with a ratchet wrench. The drill press has a “T” handle that allows you to hold the drill bit in place and the drill chuck will tighten the drill bit and keep it from slipping out when the drill is turned on.
2. Place drill press table at bottommost height setting supporting workpiece so drill passes through hole location with drill bit protruding slightly above the surface or just below the surface of the material (this depends upon the type of drilling being done).
Drilling Holes – Vertical Drilling
1. Loosen bolt clamps holding the fixed base with adjustable column assembly in place; allow for adjustment of column assembly by unscrewing clockwise while the other end is resting firmly against support board placed beneath tabletop . This enables adjusting drill press column height as the drill bit travels through the drill press table’s work surface.
2. Adjust drill press column height so drill bit protrudes from drill press tabletop. The drill tip and hopper should be at least 1/8 inches apart for proper airflow during operation.
Drilling Holes – Horizontal Drilling
1. Loosen bolt clamps that hold the fixed base with adjustable column assembly in place; allow for adjustment of column assembly by unscrewing clockwise while the other end is resting firmly against support board placed beneath drill press tabletop
2. Adjust drill press column height so drill bit protrudes from drill press table top above your workpiece to create a “hole.” The drill tip and hopper should be at least 1/8 inches from the drill press tabletop for proper airflow during operation.
NOTE: drill bit will only drill straight holes in drill press tables made of wood or metal, it cannot drill a curved hole in drill press tables made of plastic and solid surface materials; if you need to drill a curved hole, first drill a series of vertical holes to create gradual curve then drill these vertical holes with larger bits that correspond to the material being drilled through (example: 1/4″ sheetrock can be drilled using 3/8″ or 1/2″ spade bit).
3. Make sure “T”-handle is positioned on side column opposite drill press chuck, so the hand does not come into contact with rotating drill bit when the drill press is turned on;
4. Turn drill press spindle by turning drill chuck clockwise to drill into and through workpiece at desired drill press table height location; for vertical drilling, drill press table should be at the bottommost position.
NOTE: vary drill bit speed based on your project’s hardness and type of material being drilled; higher RPMs are necessary to drill smooth holes in hard materials such as metal while lower speeds are needed to drill precise circles when drilling soft plastics.
When finished, gently clean the hole with a cotton swab moistened with rubbing alcohol. Remove drill bits from the drill chuck keyless (screw) chuck using an Allen wrench or hex key, then tighten gate screw (gate retainer) – drill chuck keyless (screw) chuck so drill bits don’t fall out.
Drill Press Air Pressure Gauge Valve Maintenance
Check drill press air pressure gauge valves on a regular basis; drill press table will pop off and the drill bit can break your drill press’s base if this valve is stuck or faulty. To replace, use an Allen wrench to take off the Allen screw at the top of the air pressure gauge valve located directly beneath the drill press table. If you want to prevent repairs from occurring in the future, clean internal parts with WD-40. This prevents build-up that clogs the hole inside the air pressure gauge valve thus making it difficult to move up and down when turned by drill press spindle’s motion. Gentle use of drill press avoids unnecessary drill bit breakage.
Drill Press Vise Maintenance Tip
The drill press table’s drill vice should be used to hold workpieces during drilling whenever possible; avoid using drill chuck keyless (screw) chuck as drill bit will tend to unscrew itself if held by drill chuck. Use drill bits with handles for better gripping security. Drill bits aren’t smooth and tend to bite into the side of your hand, so be sure to wear protective gloves when working on the drill press. Avoid twisting the drill in your hand as a sharp drill tip can cut your skin easily! Another thing that is easy to do while working on a drill press that may seem like a great idea at the time would be to use a drill press drill bit holder while running the drill press drill bits into the drill press table. The drill bit will drill a hole in the drill chuck keyless (screw) chuck and break off, thus getting stuck inside the drill press center drill column where it cannot be reached.
Always remove pieces of broken drill bits from drill bit holders before operating drill bit holder on drill press table (or any workpiece). This is especially true when using abrasive cut-off wheels as they tend to break more easily than regular drills. If you do accidentally jam a piece of metal into your drilling machine, switch the machine off immediately; then use a pair of pliers, if possible, to pull out the metal or otherwise try and clear away as much so that drill bit holder drill bits can be inserted.
General pointers
A place for everything and everything in its place
Choose the perfect spot for your drill press before any installation processes. It should be placed in such a way that it is close to where most of the work-pieces need to be handled. Have a separate lighting option apart from the built in lamp of the machine. Ensure bright lighting for high visibility for better accuracy of work and to prevent any mishaps. A closed storage area in close proximity to the drill press is a good idea to store unfinished work and other handy accessories.
Fix the tiny details
Bench type drill presses can be bolted to a workbench but it’s much better and easier to use when bolted onto a wooden or steel stand separate from the workbench. Nuts and bolts should be used on the base of the machine while bolting to the bench. If the drill press is unsteady and tends to be easily toppled over, the stand or bench needs to be safely secured to the floor. The bench and stand model of drill presses can be mounted onto wooden floors using lag bolts. In the case of concrete, anchors and masonry bolts are the way to go.
Stay grounded, stay safe
Ground the drill press to protect user from an electric shock. The motor used in small drill presses is typically wired for 120 volts usage with a single phase and is assisted with an appropriate three conductor cord and three prong grounding type plug to fit snugly in a three-slot receptacle. The green colored conductor in the cord is called the grounding wire and should not be connected to a live terminal.
Power up!
Power tools should always use a unique electrical circuit protected with a 20-amp time lag fuse and is not less than 12 gauge wire. Ensure that the wire ratings of extension cords are in sync with the permitted motor amperage of tool and that the electric current voltage is same as the value written on the motor. If the extension cord is already in use, only a three-prong extension cord should be used in a grounded three pole receptacle. Ensure that the machine switch is in off position before connecting to the power source to prevent any accidental mishaps. When in usage ensure that all the line connections are tight; using in low voltage conditions damages the power tool quickly.
Also Read: Best Router Table Complete Review & Guide
The right amount of lubrication for efficient performance
Wax and oil are your friends when it comes to lubrication for power tools, including drill press. The surface of the table can be protected with a neat coat of paste wax or a thorough rub down with wax paper. Rusting of the column and quill can be prevented by using a slightly oiled cloth to wipe them. Lubricating the spline and quill using a light machine oil can go a long way in maintaining efficiency and longevity of drill press.
Less stress, smooth experience
The amount of pressure applied on power tools to control its penetration into work-pieces is called feed. Too much feed and the tool is being pushed beyond its capacity leading to rough cuts and damaged drill press. Too little feed (especially with hard materials) causes overheating of the drill press, which results in burning of the cutting edge. A perfect mix of speed and feed results in steady cuts and good quality work.
Speed Thrills but kills
The optimum speed to be used on the drill press is determined by a variety of factors that include type of cutter, size of hole, kind of material, etcetera. Soft materials can handle higher speeds while lower speeds should be used on tougher materials. A chart accompanying the tool will provide a list of permissible ratios and can be used to come close to the maximum speed with slight adjustments to the drive belt. Though speed is a rather interesting feature, steadiness should be given higher priority, which suffers as speed increases.