Last Updated on May 19, 2021 by James
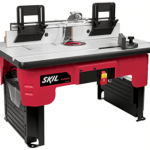
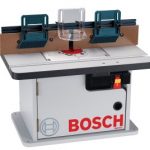
Most of the routing tables aren’t cheap, but they are very useful. If money is a problem, then you could try building your router table. It is not hard.
Why Make a DIY Homemade Router Table?
A router table is a must-have asset for any woodworker, but the problem is that the ready-built routing tables can be expensive. Another problem is that the dimensions of the ready-built tables don’t suit your needs.
When you build your table, you are free to build it in any way you see fit. You are free to cater to all of your needs, and the best part is that you won’t spend as much money as you would if you were to buy a ready-built table.
Requirements:
- Router
- Drill
- Jigsaw
- Sander
Step 1: Legs
Before you start, remember that you don’t have to replicate our dimensions. The best thing about building your router table is that you are free to customize it in any way you see fit.
One of the more important aspects of creating a homemade router table is that you can build it in any size. You should make sure that the final product fits your needs and that it lets you work comfortably.
Step 2: Brace the Legs
You should have four exact copies of legs. Next step is to join the legs together with other pieces of plywood. We used wood glue and brad nails, but no one is stopping you from using pocket screws.
The length of the plywood pieces, which are holding the legs together, depends on how wide or deep you want the table to be. Don’t be afraid to experiment, and make sure that the legs are braced well together because you want the whole construction to be as sturdy as possible.
Step 3 (Optional): Add Caster Wheels
Caster wheels can be added to the legs of your table without any problems. It is a simple task, and the result is a more mobile table. We highly recommend that you add the caster wheels to your table, but it is not a must.
Step 4: Build the Work Surface
You have managed to create the legs, and the time has come to work on the top. Our table top is 32″ by 20″. It is constructed from a 1/2″ piece of plywood glued and screwed together with a 3/4″ thick piece of melamine.
The melamine is our work surface; it is smooth and durable. You are free to use only plywood if you want to, and you can use raw MDF as well. You are also free to laminate the tabletop because it will give you less friction.
If you want, add a few t-track section which will make it easier for you to adjust the fence and keep it locked in place.
Step 5: Mount the router
We have mounted our router to the middle of the melamine section. We have removed the motor from the router base and centered it on our melamine section. We marked the center hole and outside mounting holes.
We have drilled the holes and cut out the large center hole with a jigsaw. Our router could fit perfectly. You can always save time by buying commercial plates.
Step 6 (optional): Add a Paddle Switch
If you want to add safety to your homemade router table, we recommend that you add a paddle switch. This way you won’t have to reach under the table every time you want to turn the router on or off.
Step 7: The Fence
The fence we have made is nothing but two pieces of melamine joined with pocket screws. If you have incorporated t-tracks into the work surface, drill a hole into the bottom piece of the fence to allow for the t-track handles.
Conclusion
There you have it, a fully functional routing table! You can freely customize it by adding a dust port to the back of the fence. You can glue the dust port to a piece of plywood that sits behind the router bit. The front of the fence needs to have an opening that is a bit wider than the router bit.
You don’t have to fasten the top to the base, but be sure to wrap the table top in additional plywood to keep it anchored to the base. This way you can take the top off for easier transport and storing.
You will make a few mistakes, but don’t worry, it will pay off. In the end, you will have a fully-functional routing table without spending a lot of money.
Get creative, and start working!
