Last Updated on May 28, 2021 by James
If you want the surface of your wood to glow in sunlight, lighting up the room with its golden radiance, then you need to acquaint yourself with sanders and how to use a detail sander in the right way. Sanding and staining helps to bring out the inner beauty of wood and it is not really a difficult task. You do not need to rub your fingers raw with the help of a sandpaper in order to get into the cracks and crevices. This is where a detail sander comes in handy for you!
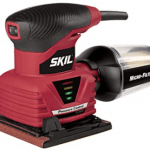
Whether it be removal of paint or smoothening the surface of wood, a detail sander can be really useful to you. You can easily sand corners, edges and even tight spaces where your hands might not reach. A detail sander comes with a small vibrating head to which you have to attach the sandpaper. Some distinct detail sanders come with a hardened rubber bit that comes in different shapes and sizes. You only need to wrap the bits with an adhesive sandpaper in order to fit into the curved spaces and slots. Detail sanders help you to reach all nooks and corners of the surface, and even remove paint and stains from over wood surfaces.
Things To Keep In Mind When Using A Detail Sander
Here are a few things you need to keep in mind when you are using a detail sander:
With a detail sander, like most other types of sanders, you have to keep it moving or you might end up with an unpleasant notch.
Always make sure to use light and controlled touches with the detail sander rather than rubbing hard with it. You can go over one spot several times rather than sanding it hard once or twice.
Try different angles, bits, and grades of sandpapers in order to achieve the results that you particularly want. The graining of the wood will entirely depend on how you use the detail sander over the wood surface.
A detail sander is also called a corner sander which is one of the most important tools one can have in their workspace if you are dealing with woodwork in your projects. Here in we will share with you some important tips on how to use a detail sander in the right way:
1. When You Are Working With Newly Assembled Furniture
Furniture refinishing is one of the most common uses of a detail sander. Your newly assembled furnitures might have intricate details to them – these might areas where the sanders might not reach. In such a situation, make use of the triangular shaped pads which comes along with a detail sander so as to reach the tighter spaces. The size of the pad will help you in smoothing the surface in a proper way without causing any kind of harm on the overall material.
2. Keep It Slow!
Try not using the detail sander in a rough way, always be slow with the process. A detail sander has been designed in a way that it takes minimal level of the material away from the surface. This is particularly applicable for delicate items, craft projects or woodwork with detailed surfaces. Try not putting a lot of pressure and force on the surface of the wood or else you could ruin the material and also the tool.
3. Finishing Products
The one good thing about working with a detail sander is that you can purchase a wide range of attachments for them. For instance, you can make use of buffing pads so as to provide smooth finishes without worrying about graining the wood or creating unwanted lines. Detail sanders are also well known for finishing items that are made of metal.
4. Do Not Put Too Much Pressure
Detail sanders are practical and useful tools which does not require you to apply all your force when working with them. They are however not meant for extreme, heavy duty pressure projects. So you can take good amount of time and not force the sander to get the job done.
5. Change The Oscillation Speed
One good feature about a detail sander is that you can change the speed, depending on how fast or slow you require the speed to be for the particular project. You can easily change the oscillation speed depending on whether you want to increase or decrease and how much stress you need to put on the sander and also depending on what kind of material you are working on.
Conclusion
Most of the detail sanders come with a wide variety of attachments to them – some of them will be items that you will not even require for the purpose of sanding. The customary oscillation of a detail sander makes it a great tool for cutting grout and for the purpose of moldings. If you are applying soft oscillation techniques, the tool will prove to be safe and you can even cut through hard materials with it.
Also, if you’re interested in oscillating tool, we have a helpful buyer’s guide found here.