Last Updated on April 20, 2021 by James
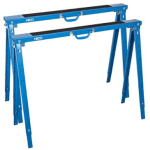
A sawhorse is tough and sturdy frame support which is made of metal, wood, or plastic that holds the material which is being cut by a jigsaw, circular saw or any other cutting tool.
It is also used as a sturdy work surface by carpenters for cutting a large piece of wood for making furniture.
The plastic sawhorses are very lightweight and can be adjustable to different heights. They are also foldable which makes it easy to store and carry.
Why Do You need to Build a Sawhorse?
A sawhorse is helpful in a variety of situations. You can use a sawhorse when you need to cut something. It provides support and elevation you need to cut the material properly.
Most of the carpenters and professionals use a pair of sawhorses to make a makeshift work table or workbenches. Just place a piece of plywood over the two sawhorses, and your work table is ready.
You can also use it as a fulcrum or a makeshift seesaw. You can also use it for several other purposes depending upon your creativity.
How to Build a Sawhorse?
It is very easy to build your own sawhorse. It can also be a great starter project for someone who hasn’t worked with tools ever but wants to learn the craft.
Although you can buy a ready-made sawhorse from any local hardware store, it is always fun to build your own equipment or tool that will serve you for years to come.
Step 1 – Get a few boards.
Get boards of length 2*6 and split them to make the finished product lighter in weight. You can also use timber of size 2*4 without ripping it apart. If you want to build sawhorses for outdoor work, then use the timber that does not get affected by insects and rots.
Step 2 – Set up the work table.
As you are building sawhorses, you need to set up your work surface properly to measure and cut the timber. Have all the necessary tools and materials you need while building them.
Step 3 – Rip the lumber.
If you are using 2*6 boards, then cut the lumber into half as it will reduce the overall weight and the quantity of lumber required by half. Instead of 2*6, if you are using 2*4 boards, then you can skip this step.
Step 4 – Measure the length of the legs.
Now, you need to measure the length of the legs of sawhorses according to your requirements. For example, if you are six foot, the length of the legs should be approximately 34 to 36 inches. It is recommended to build the sawhorse a bit tall because later the legs can be trimmed if needed.
Step 5 – Cut a bevel on the first leg.
If you want a good spread on the horse’s legs, then make a cut of 25 degrees from the board’s edge. The cut needs to be flat and straight so that they can easily fit against the top board tightly.
Step 6 – Cut the top board of the horse.
Cut the top board for about 42 to 48 inches long and make a mark from each end. You can also draw a line to know where you need to attach the legs.
Step 7 – Place the board on a flat surface.
Nail the leg of the horse against the edge of the board tightly. You should blunt the nails as it decreases the chances of splitting the wood when nailed. The size of the nails should depend on the boards because you do not want that they pass through both pieces.
Step 8 – Nail both legs.
You need to nail both the legs on the side of the top board and flip them over. Use long nails because it will pass through the first pair of legs which will increase the strength of the joints.
Step 9 – Stand your horses and measure the lengths.
Measure the length of 20 cm from the bottom of your board. Use a short board and scribe its sizes to fit between the legs. The angles of the braces should be 115 degrees from top and 65 degrees from the bottom.
Step 10 – Nail the braces.
With the help of two 12d nails, attach both the braces on the leg of the sawhorse. You need to make sure that the position of the legs is perfect so that it stands flat and straight. If you nail the braces out of position, the horse will wobble and fall.
Step 11 – Flip the horse back and place another board.
Cut another board of 46 cm size with an angle of 45 degrees diagonally. Place the end against the brace and scribe at the place where you want to intersect and cut.
Step 12 – Nail the braces in place and do final checks.
Finally, nail both the braces across the bottom of each board. Use the nails of the length of 12d so that it quickly gets in the boards. Check all the horses are equal in length and the top board is parallel to the ground.

